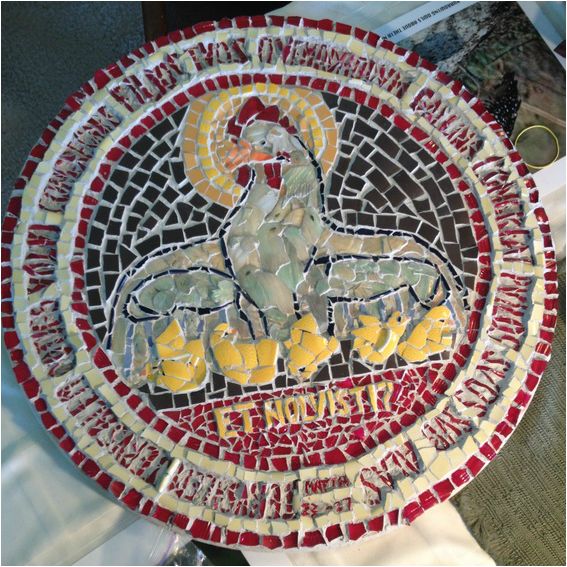
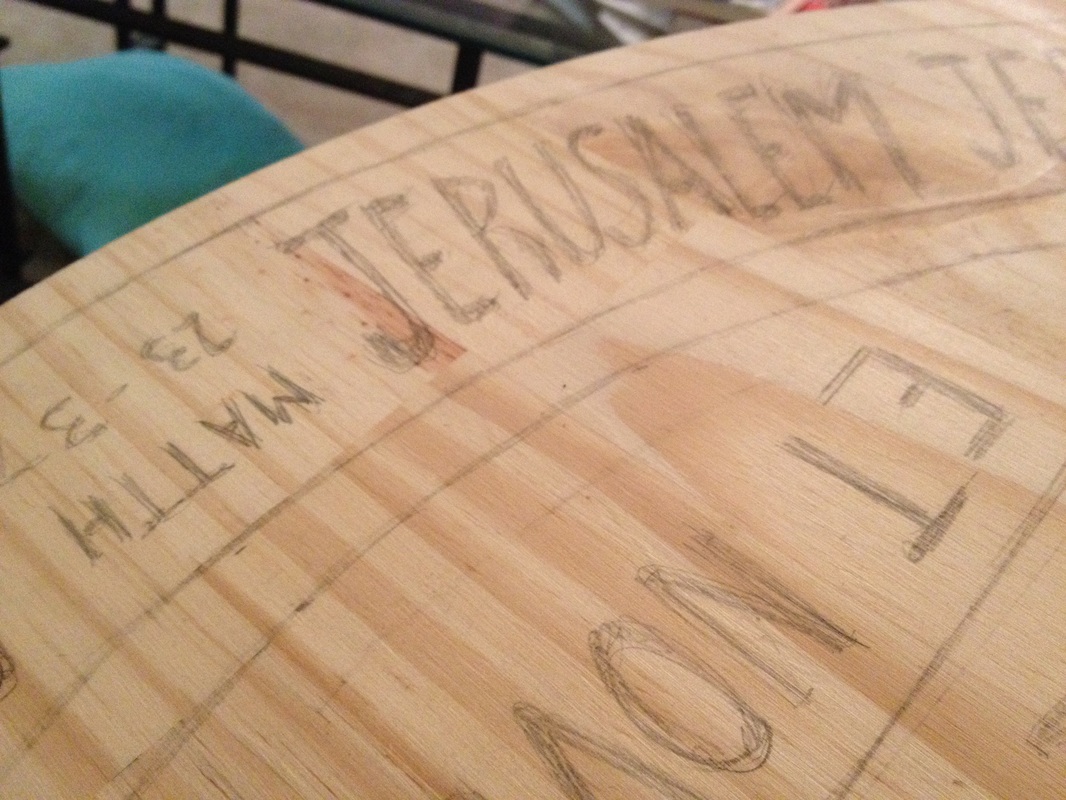
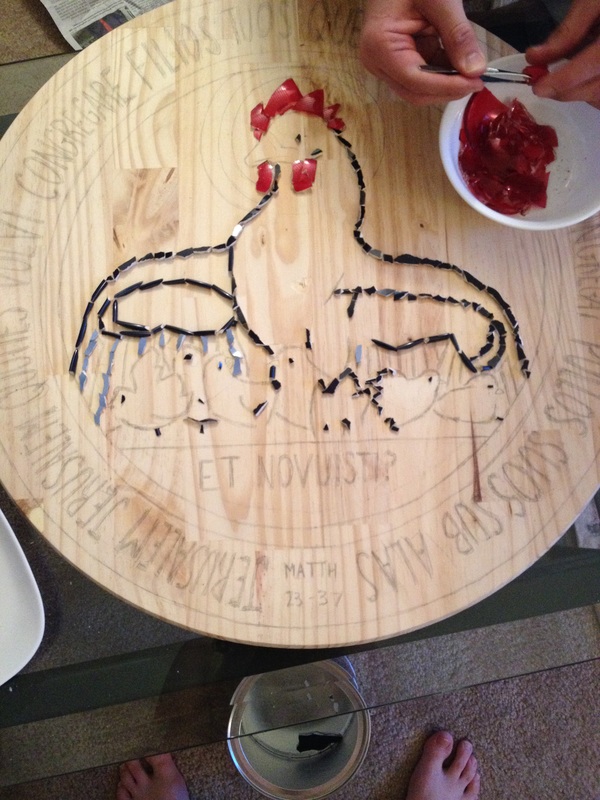
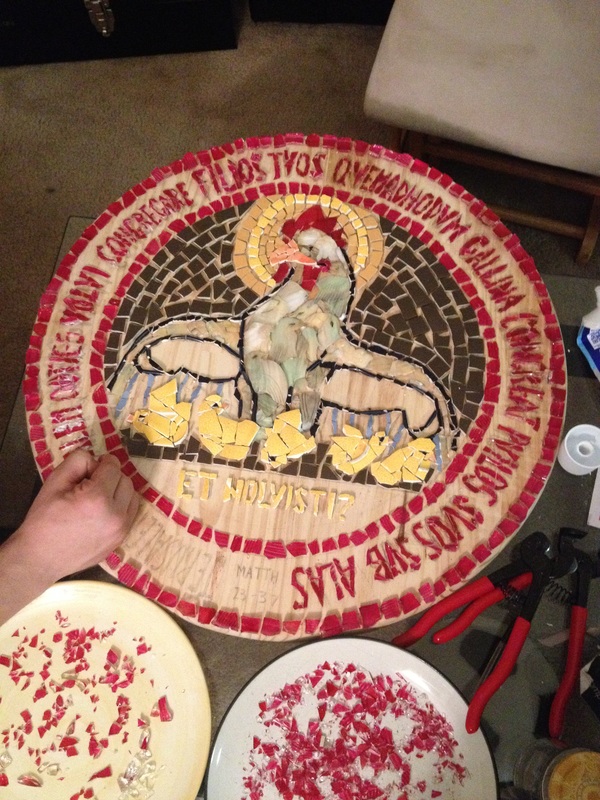
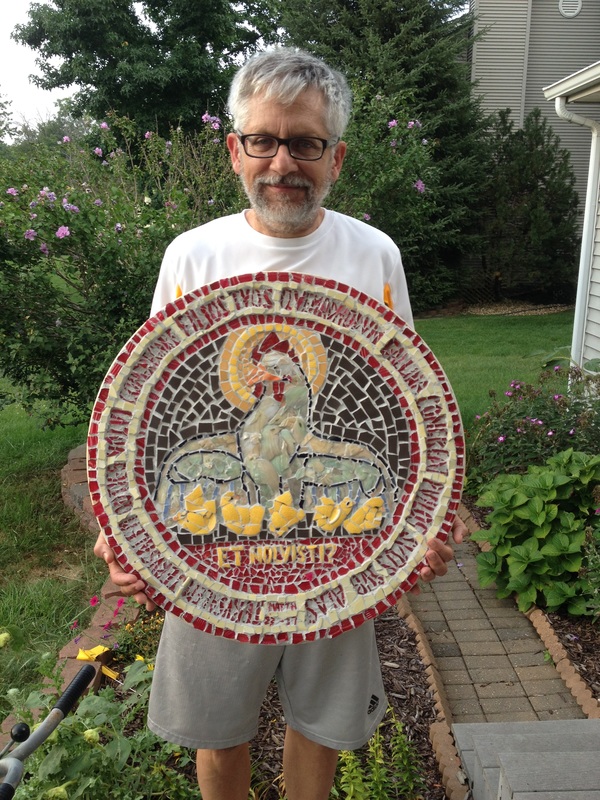
"Jerusalem Jerusalem qoties volvi congregare filios tuos quemadmodum gallina congregat puilos suos sub alas et nolvisiti?" Matth 23-37
This is our recreation of the mosaic located at the foot of the altar in the Church of Dominus Flevit (in Jerusalem). It is a shortened version of the passage from Matthew:
"Jerusalem, Jerusalem, you who kill the prophets and stone those sent to you, how often I
have longed to gather your children together, as a hen gathers her chicks under her wings,
and you were not willing."
It struck Dan as a very profound verse to put at the foot of an altar and he really liked it. He began playing with the idea of recreating it on a smaller scale. He shared the idea with me and before long we were starting it. Our hope was to give it to Dan's dad as a gift. That was well and good but his parents were coming for a visit in a month's time so we had to get moving.
Initially, I was going to let Dan have this project to himself, but he convinced me to help him by calling it a "big puzzle." That was all it took to get me on board. For our first mosaic of any kind, this was quite the project we were taking on, but we were eager to tackle it and learn along the way.
Tools we used:
- Wooden base (We used a 1" by 23.75" pine round from Home Depot)
- Pencil and ruler
- Strong adhesive glue (We used Loctite All Purpose Clear)
- Plates, ceramics, and other glass of the colors you want to use (We bought what we used at Goodwill)
- Tile nippers (from Michael's)
- A hammer
- Tile grout (We used gray)
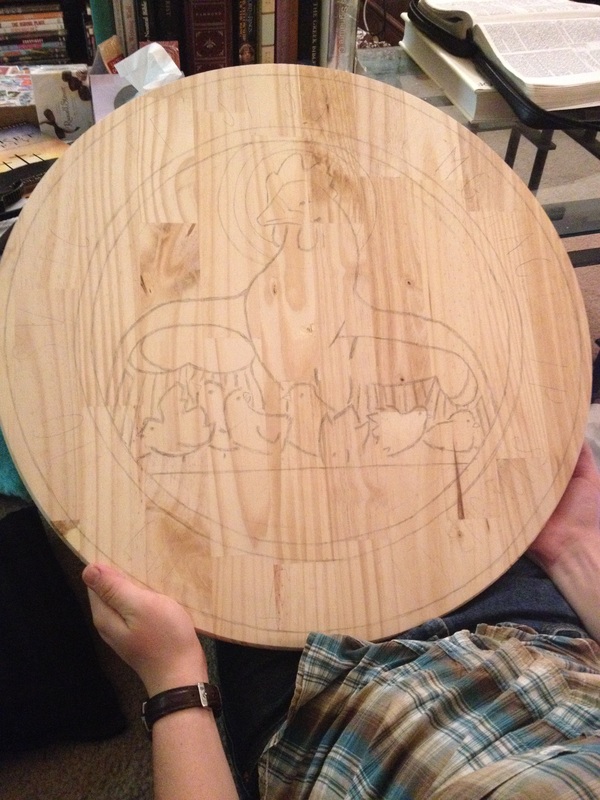 |   |
1.) Begin by penciling the main outlines, using the ruler to help with any straight edges and with measurements. If you don't have a colored picture you can use as a reference, I would highly recommend getting one before doing this step.
When drawing, make the lines a little thicker to allow room for the glass to fit. Depending on the size of your mosaic you may have to compromise on the amount of detail you put into it. It you look at the drawing above verses the finished product (the first picture on this post) you will notice there are seven chicks drawn, but only five actually made. That was because when we came to those, we realized that we didn't have the room to outline all of them AND fill them in. It would not have looked like baby chicks at all. So we ended up spacing five chicks apart enough that we didn't need to outline each one and you could still tell what they were. Had we done this on a larger scale we could have kept that detail there, but not on something this small.
Feel free to draw the detail on now, though. Being able to see it sometimes help you decide what needs to stay and what you can get away with taking out. Remember, the pencil lines are going to be completely covered up so you don't have to worry about drawing lightly.
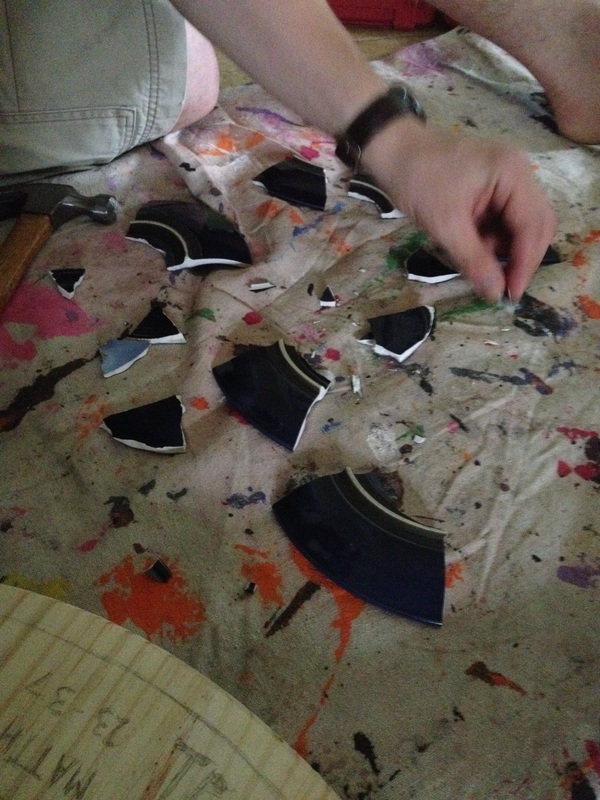
2.) And now the fun begins! Once you are finished drawing it is time to break some plates and get to placing them on the picture! This is where you will want to use those tile nippers as well. The closer to the same shape you can make the pieces the better, but don't stress it if they aren't the exact same. It is a mosaic, the pieces are supposed to be different! However, do try picking pieces of the same thickness. It will keep the smallish pieces from getting swallowed up when it is time to grout.
Something to think about while deciding what order to glue it all down: Is what I am currently working on in the foreground or is part of it behind another section? We glued down the chicks before the wing details because the chicks were in front of the wings. We glued the beak, crown, and eye down on the hen's head before we started on the inside. These are all things you have to take into consideration when making a mosaic with different sized and shaped pieces like this. Get the main outline placed first and then play around with placing other pieces. DO NOT GLUE UNTIL YOU ARE POSITIVE YOU WANT THE PIECES THERE!
Something to think about while deciding what order to glue it all down: Is what I am currently working on in the foreground or is part of it behind another section? We glued down the chicks before the wing details because the chicks were in front of the wings. We glued the beak, crown, and eye down on the hen's head before we started on the inside. These are all things you have to take into consideration when making a mosaic with different sized and shaped pieces like this. Get the main outline placed first and then play around with placing other pieces. DO NOT GLUE UNTIL YOU ARE POSITIVE YOU WANT THE PIECES THERE!
 We started with the outline of the hen and played around with her head and wings some as well. | 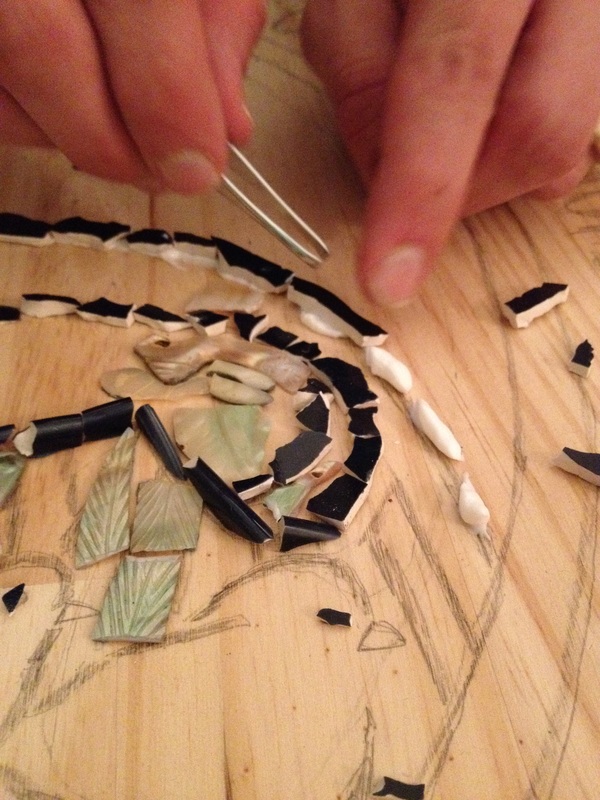 We both agreed on the outside lines so we got to gluing those down. | 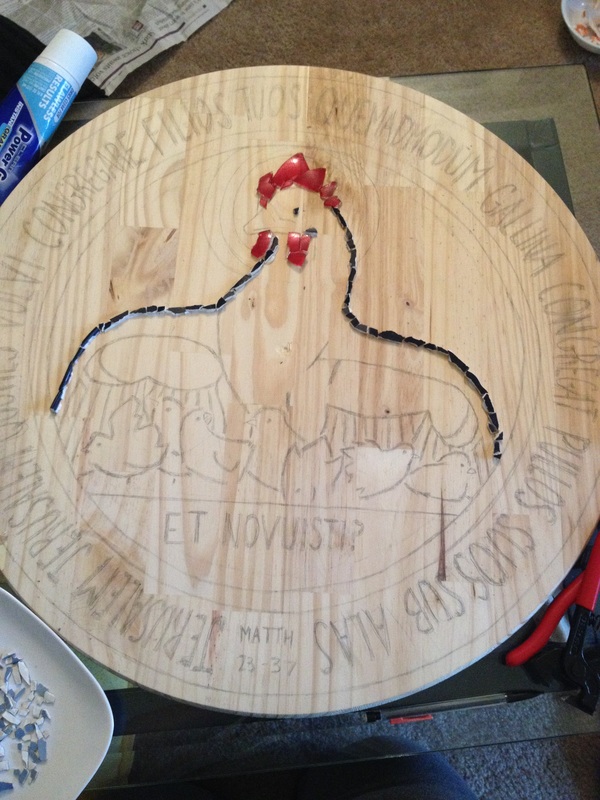 I cleared all the not glued down pieced away so I could get a better idea of what we were working with. Doing this throughout the project will really help you with where you are going with it. |
 We got the rest of the outline glued down then got to work on some other important parts. We glued down the beak then started on the chicks. | 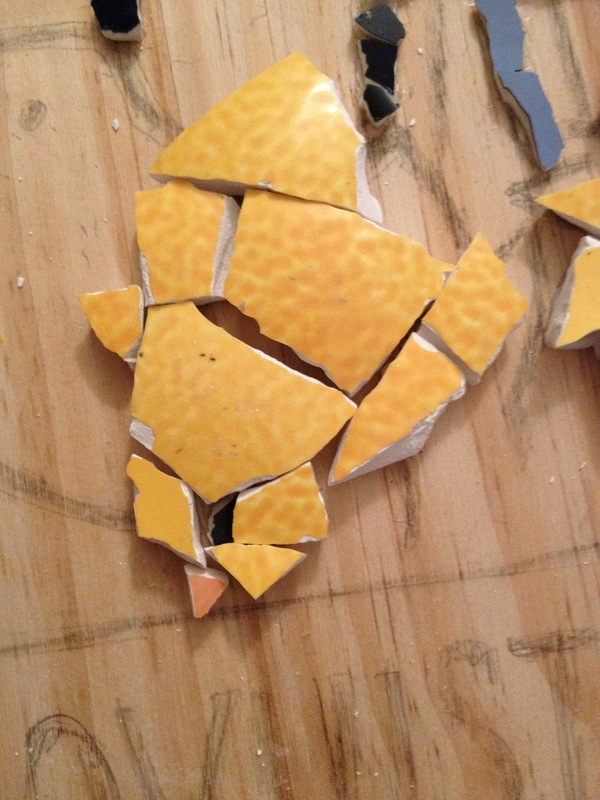 This gives you an idea of how much we ended up straying from the original drawing. When we glues the chicks down, we did the furthest on the outside first and worked our way in. After they were glued, I went back and glued down the light blue of the hen's wings. | 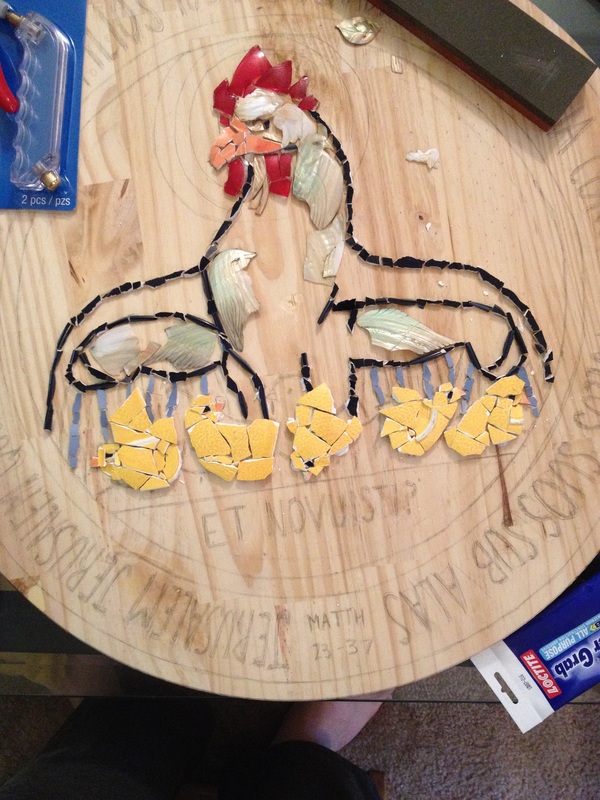 All the chicks are finally in place! |
At this point, we had the main outline of the hen, the red on her head, her eye and her beak, the chicks, and the outline of her feathers glued down. Everything else was loose and still being manipulated and moved. It is a process, but once you get the hang of it it really is like making your own puzzle!
 The body of the hen was my project. While I fiddled with that, Dan got to work on the background. | 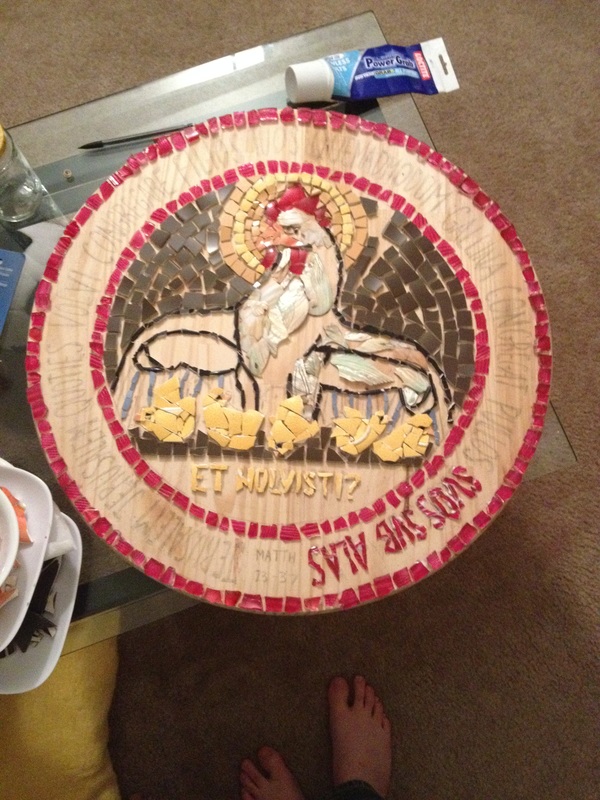 Needless to say, his progress was moving much faster than mine. He was also home more than I was, so that helped. |
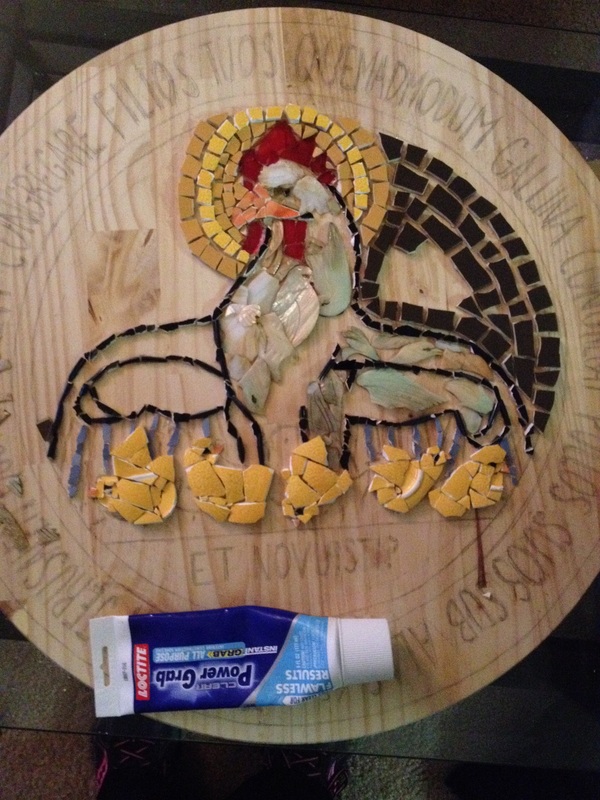
 Dan said the lettering was by far the most difficult part. The glass we were using kept shattering into pieces too small for us to use so we had to resort to different, unorthodox methods to get it to break into decent sized pieces. | 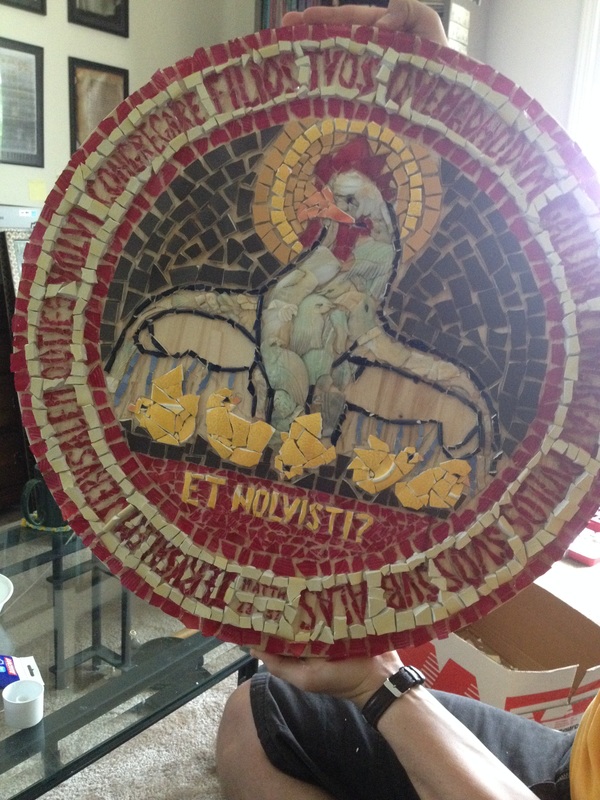 This was the last picture I took before we started grouting. I did get the wings finished shortly after this picture was taken! |
And now it is time to grout! I would recommend watching a YouTube video to see a visual of how the consistency of the grout is supposed to look. The video we watched said it needs to seem like runny mashed potatoes. Grout hardens very quickly, so once you spread it, give it a minute or two to set and then get to work taking it off.
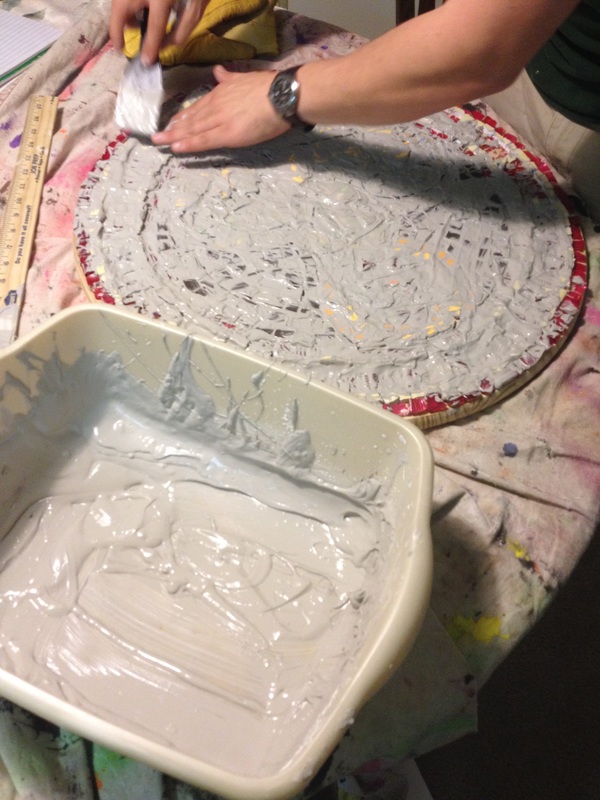 We basically dove head first and covered the entire surface with grout. We dropped large globs on different sections and spread it out using a putty knife. Make sure to get all the way to the edges. |  Looking back, it may have been wiser to do sections at a time. It took a LONG time to get it all cleaned up. We used sponges, paper towels, damp cloths, you name it. Anything that would take the hardening grout off of the top of the tiles. | 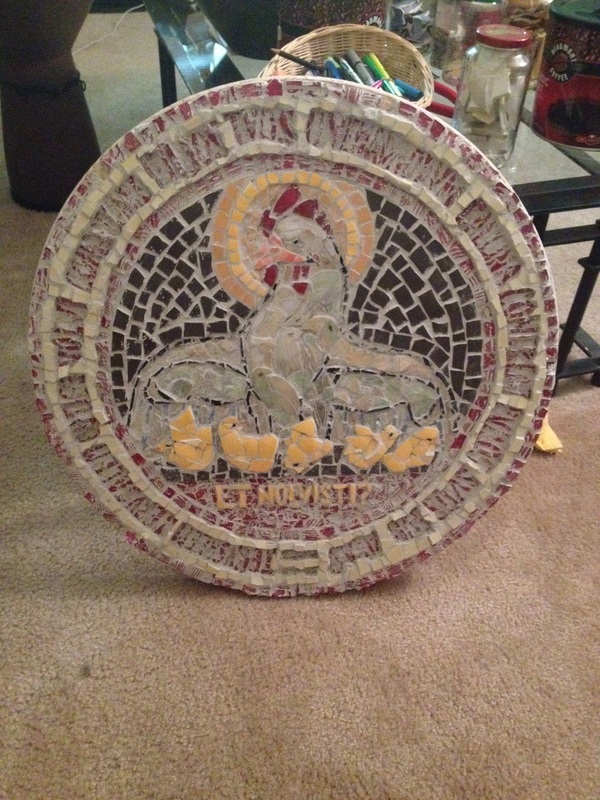 This was how it looked when we got the grout off at first. It was very cloudy and we still had a lot of scraping to do to get more grout out of certain areas. |
| Because of how long it took us to get it off, the grout dried over certain pieces of glass and swallowed the shortest pieces. Over the following weeks we worked on it a little at a time, using toothpicks to gently scrape the grout off and uncover important details (especially around the lettering). On some of the larger chunks of grout we took a very small flat head screwdriver and it worked just fine. Some of the red glass that we bought was very cheap painted glass and when we scraped the grout off the paint came right off with it. A friend of ours made a comment in joke saying that we should take nail polish to it. We didn't take it as a joke and decided to give it a try. It worked surprisingly well and it is near impossible to tell which ones were painted and which weren't. | 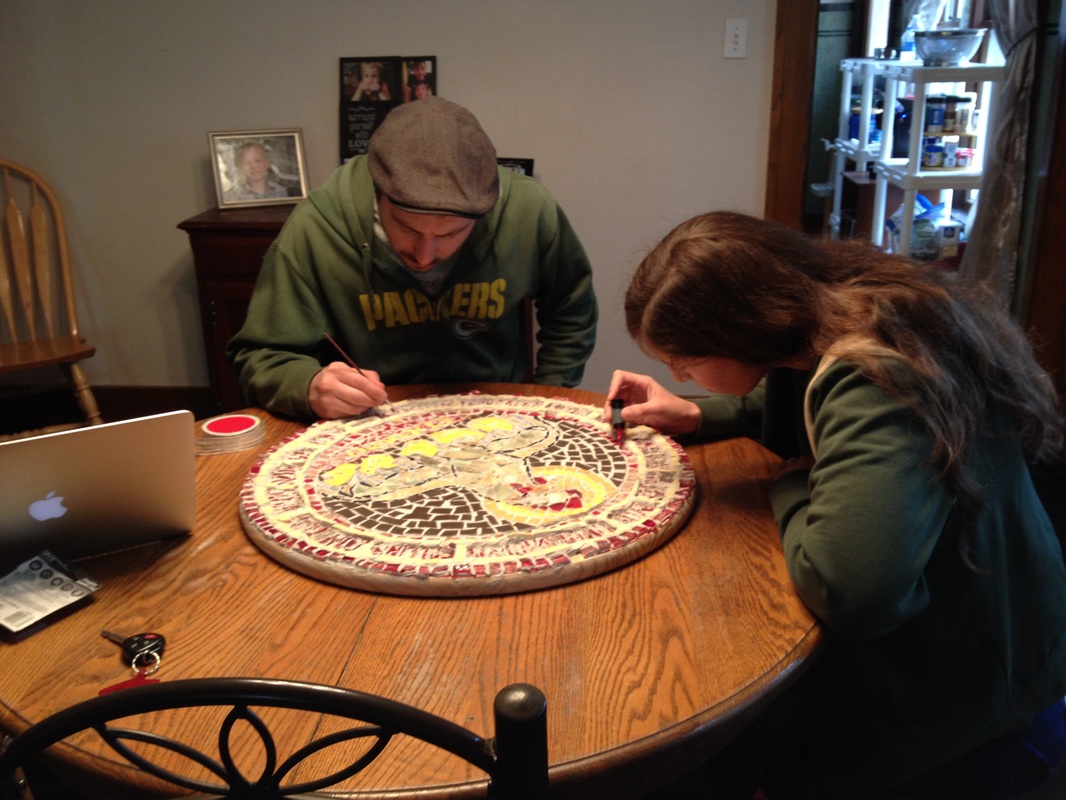 Dan and I working to get the glass repainted. |
And there you have your mosaic! We did a bit more touch up work on some very small pieces that the grout swallowed but were then completely done. I hope this simple tutorial is enough to get you going to trying your own masterpiece! Let me know how it goes and show a picture of your finished product!
 RSS Feed
